Getting Started with Meteor.js with React
Getting Started with Meteor & React: Part 1
Meteor with React | Image Source
I will start from the introduction of Meteor, Meteor is full-stack JavaScript platform for developing modern web and mobile applications.
-
Meteor provides you the way to manage Client & Server communication efficiently.
-
It is built upon Node.js & MongoDB.
-
It includes a key set of technologies for creating a Full stack Web-app, using build tool and curated set of Node.js packages.
It’s not just a framework, it’s more than that. You can think of Meteor to Node.js as Rails to Ruby.
While React is front end library developed by Facebook. It’s used for handling view layer for web and mobile apps. ReactJS allows us to create reusable UI components. It is currently one of the most popular JavaScript libraries and it has strong foundation and large community behind it.
In this article, we’ll be making a Todo App and our main focus will be on Meteor and its derivatives. So I will not be covering more of React.js in this post. If you want to learn more about React, you can go to its Official docs.
Prerequisites
Project Structure:
├── client
│ ├── main.css
│ ├── main.html
│ └── main.jsx
├── imports
│ ├── api
│ │ ├── tasks.js
│ │ └── tasks.test.js
│ ├── startup
│ │ └── accounts-config.js
│ └── ui
│ ├── AccountsUIWrapper.jsx
│ ├── App.jsx
│ └── Task.jsx
├── package.json
└── server
 └── main.js
Let’s Start:
Here, I will be making the Todo App from the Official tutorials which will manage a ‘todo list’ on which registered users can collaborate with others on those task.
If you haven’t already Installed Meteor, Please install it using the methods provided by Meteor. This Project has been built using Meteor version 1.5.
Now as the next step, to create a Meteor app, Open the terminal and type:
meteor create simple-todosAfter running this in terminal, You’ll have a new folder called simple-todos with all of the files that a Meteor app needs.
**client/main.js**      *# a JavaScript entry point loaded on the client*

**client/main.html **   *# an HTML file that defines view templates*

**client/main.css**     *# a CSS file to define your app's styles*

**server/main.js**      *# a JavaScript entry point loaded on the server*

**package.json **       *# a control file for installing NPM packages*

**.meteor **            *# internal Meteor files*

**.gitignore **         *# a control file for git*
To get your app running, type in terminal:
cd simple-todos
meteor
Now open ***http://localhost:3000 ***in your web browser to see the app running.
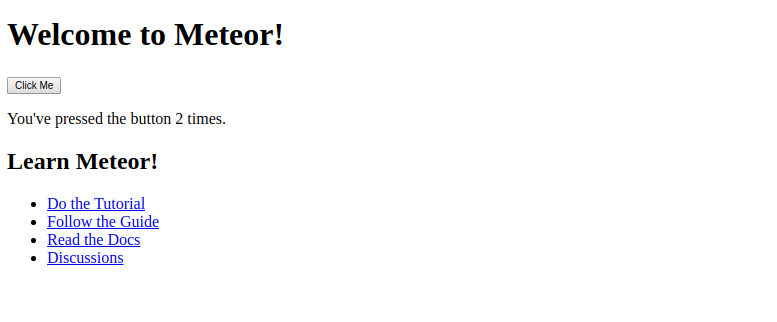
At the very initial Phase, it’ll look like the image below :

Now that the app is working in your browser, let’s start building our Todo-list app.
Using React components to declare the Views:
To start working with React as our Front end library, we’ll have to import some npm packages provided. Open the terminal in the App directory and type:
meteor npm install — save react react-domTo learn about meteor npm , go to the official docs.
From here, we’ll be using our own codebase by replacing the default code provided bye the Meteor boilerplate.
Let’s replace the starter html code with this one:
<!-- ***client/main.html -->***

<head>

  <title>Todo List</title>

</head>

<body>

  <div id="render-target"></div>

</body>
Meteor parses all of the HTML files in your app folder and identifies three top-level tags: , , and .
Everything inside any
tags is added to the head section of the HTML sent to the client, and everything inside tags is added to the body section, just like in a regular HTML file. Though Meteor uses template also, but since we’ll not be using it so, there’s no need to discuss it.Now, we’ll create some React **Components **to built the view layer of our app.
**delete/rename ***client/main.js* to client/main.jsx
// client/main.jsx

import React from 'react';

import { Meteor } from 'meteor/meteor';

import { render } from 'react-dom';

import App from '../imports/ui/App.jsx';


Meteor.startup(() => {

render(<App />, document.getElementById('render-target'));

});
main.jsx contains the initialization code to load the other components and renders them to #render-target html element.
Create a new directory called imports which will contain the action files which will not be loaded automatically by the Meteor server. And then create a directory ui which will contain our view components.
imports/ui/App.jsx
// imports/ui/App.jsx

import React, { Component } from 'react';
import Task from './Task.jsx';

*// App component - represents the whole app*

export **default** **class** App extends Component {

getTasks() {

**return** [

    { _id: 1, text: 'This is task 1' },

    { _id: 2, text: 'This is task 2' },

    { _id: 3, text: 'This is task 3' },

     ];

}

renderTasks() {

**return** **this**.getTasks().map((task) => (

    <Task key={task._id} task={task} />

));

}

render() {

**return** (

  <div className="container">

    <header>

    <h1>Todo List</h1>

    </header>
    <ul>

   {**this**.renderTasks()}

    </ul>

 </div>

);

}}
This is the main App component which will contains other child components to get them rendered in an ordered way.
imports/ui/Task.jsx
We need to add a npm package to check the Types of Props and whether it is required or not being passed to the Child components (in context to Task.jsx). Type the command below in terminal to add it.
npm install -S prop-types
// imports/ui/Task.jsx

import React, { Component} from 'react';
import PropTypes from 'prop-types';

*// Task component - represents a single todo item*

export **default** **class** Task extends Component {

render() {

**return** (

  <li>{**this**.props.task.text}</li>

);

}}

Task.propTypes = {

*// This component gets the task to display through a React prop.*

*// We can use propTypes to indicate it is required*

task: PropTypes.object.isRequired,

};
This component will render all the tasks created by Users.
Till now, we have made the semantic elements for the app, Now we should add the styling.
client/main.css
/* client/main.css */

body {
  font-family: sans-serif;
  background-color: #315481;
  background-image: linear-gradient(to bottom, #315481, #918e82 100%);
  background-attachment: fixed;

  position: absolute;
  top: 0;
  bottom: 0;
  left: 0;
  right: 0;

  padding: 0;
  margin: 0;

  font-size: 14px;
}

.container {
  max-width: 600px;
  margin: 0 auto;
  min-height: 100%;
  background: white;
}

header {
  background: #d2edf4;
  background-image: linear-gradient(to bottom, #d0edf5, #e1e5f0 100%);
  padding: 20px 15px 15px 15px;
  position: relative;
}

#login-buttons {
  display: block;
}

h1 {
  font-size: 1.5em;
  margin: 0;
  margin-bottom: 10px;
  display: inline-block;
  margin-right: 1em;
}

form {
  margin-top: 10px;
  margin-bottom: -10px;
  position: relative;
}

.new-task input {
  box-sizing: border-box;
  padding: 10px 0;
  background: transparent;
  border: none;
  width: 100%;
  padding-right: 80px;
  font-size: 1em;
}

.new-task input:focus{
  outline: 0;
}

ul {
  margin: 0;
  padding: 0;
  background: white;
}

.delete {
  float: right;
  font-weight: bold;
  background: none;
  font-size: 1em;
  border: none;
  position: relative;
}

li {
  position: relative;
  list-style: none;
  padding: 15px;
  border-bottom: #eee solid 1px;
}

li .text {
  margin-left: 10px;
}

li.checked {
  color: #888;
}

li.checked .text {
  text-decoration: line-through;
}

li.private {
  background: #eee;
  border-color: #ddd;
}

header .hide-completed {
  float: right;
}

.toggle-private {
  margin-left: 5px;
}

@media (max-width: 600px) {
  li {
    padding: 12px 15px;
  }

  .search {
    width: 150px;
    clear: both;
  }

  .new-task input {
    padding-bottom: 5px;
  }
}
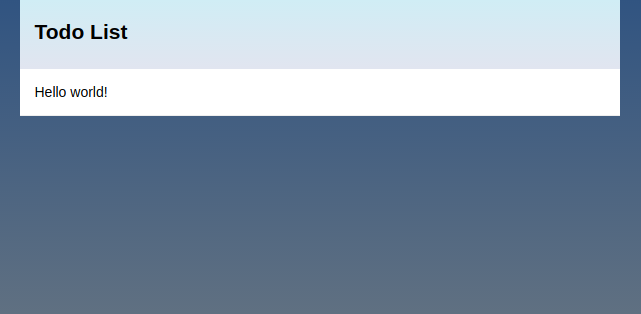
Now the app should look like the image below, if not please recheck the previous steps.

Storing tasks in a collection
Collections are Meteor’s way of storing persistent data. Meteor uses integrated **Mongo Shell **to store the data using MongoDB Collections. The data stored in the Collections can be accessed from both Client and Server.
They also update themselves automatically, so a view component backed by a collection will automatically display the most up-to-date data. To create the collection,create a new directory api under *imports *directory* *and define a new tasks module that creates a Mongo collection and exports it:
imports/api/tasks.js
import { Mongo } from 'meteor/mongo';

export **const** Tasks = **new** Mongo.Collection('tasks');
This module create a MongoDB collection from which we can retrieve the Client data.
Since, we have created this module. to get it to work, we’ll need to import it into server/main.js
server/main.js
// server/main.js

import { Meteor } from 'meteor/meteor';
import '../imports/api/tasks.js';

Meteor.startup(() => {
  // code to run on server at startup
});
To use the data from Collections, we have created, we need to add an atmosphere package react-meteor-data and some npm packages which it uses react-addons-pure-render-mixin. It will help us create a data-container to feed our app, meteor’s reactive data.
Run this in terminal to add them:
meteor npm install --save react-addons-pure-render-mixin
meteor add react-meteor-data
To use react-meteor-data, we need to wrap our component in a container using the createContainer Higher Order Component { a higher-order component is a function that takes a component and returns a new component}:
After updating App component, it’ll be :
import/ui/App.jsx
// import/ui/App.jsx

import React, { Component} from 'react';
import PropTypes from 'prop-types';
import { createContainer } from 'meteor/react-meteor-data';

import { Tasks } from '../api/tasks.js';

import Task from './Task.jsx';

// App component - represents the whole app
class App extends Component {
  renderTasks() {
    return this.props.tasks.map((task) => (
      <Task key={task._id} task={task} />
    ));
  }

render() {
    return (
      <div className="container">
        <header>
          <h1>Todo List</h1>
        </header>

        <ul>
          {this.renderTasks()}
        </ul>
      </div>
    );
  }
}

App.propTypes = {
  tasks: PropTypes.array.isRequired,
};

export default createContainer(() => {
  return {
    tasks: Tasks.find({}).fetch(),
  };
}, App);
In the above code, the higher order component createContainer wraps up the App component and fetches tasks from the Tasks collection. It then pass all the tasks to wrapped App component as tasks prop . As the data changes it’ll re-render the App component.
At this time, all the tasks will disappear as we are not loading them from Meteor collections.
Now we need to start our server database and insert a task to our collection. Open a new terminal in the app directory and run:
meteor mongoWhen the new console fire ups, insert the task using below command:
db.tasks.insert({ text: "Hello world!", createdAt: **new** Date() });After running this you’ll see a Hello world! task has been added to our app.

Add form for new tasks
Being so far, lets add a form for the user to insert the todo tasks in the App component. And a function handleSubmit to handle the onSubmit event:
// imports/ui/App.jsx

import React, { Component} from 'react';
import PropTypes from 'prop-types';
import ReactDOM from 'react-dom';
import { createContainer } from 'meteor/react-meteor-data';

import { Tasks } from '../api/tasks.js';

import Task from './Task.jsx';

// App component - represents the whole app
class App extends Component {
  handleSubmit(event) {
    event.preventDefault();

// Find the text field via the React ref
    const text = ReactDOM.findDOMNode(this.refs.textInput).value.trim();

Tasks.insert({
      text,
      createdAt: new Date(), // current time
    });

// Clear form
    ReactDOM.findDOMNode(this.refs.textInput).value = '';
  }

renderTasks() {
    return this.props.tasks.map((task) => (
      <Task key={task._id} task={task} />
    ));
  }

render() {
    return (
      <div className="container">
        <header>
          <h1>Todo List</h1>

<form className="new-task" onSubmit={this.handleSubmit.bind(this)} >
            <input
              type="text"
              ref="textInput"
              placeholder="Type to add new tasks"
            />
          </form>
        </header>

        <ul>
          {this.renderTasks()}
        </ul>
      </div>
    );
  }
}

App.propTypes = {
  tasks: PropTypes.array.isRequired,
};

export default createContainer(() => {
  return {
    tasks: Tasks.find({}).fetch(),
  };
}, App);
In the above code, handleSubmit function inserts new task to tasks collection and render them.
Let’s sort the tasks according to the time they are created, replace the higher order component logic with this:
export default createContainer(() => {
  return {
    tasks: Tasks.find({}, { sort: { createdAt: -1 } }).fetch(),
  };
}, App);
Just checkout your app in the browser, its working properly or not. Please recheck above steps if not working properly.
Checking off and deleting tasks
You have already observed that, until now we can only insert tasks. Neither it can be updated or deleted. So lets jump to fix this.
We’ll be adding two new elements to our Task component, a checkbox and a delete button, with event handlers for both:
imports/ui/Task.jsx
// imports/ui/Task.jsx
import React, { Component} from 'react';
import PropTypes from 'prop-types';
import { Tasks } from '../api/tasks.js';
// Task component - represents a single todo item
export default class Task extends Component {
toggleChecked() {
// Set the checked property to the opposite of its current value
Tasks.update(this.props.task._id, {
$set: { checked: !this.props.task.checked },
});
}
deleteThisTask() {
Tasks.remove(this.props.task._id);
}
render() {
// Give tasks a different className when they are checked off,
// so that we can style them nicely in CSS
const taskClassName = this.props.task.checked ? 'checked' : '';
return (
<li className={taskClassName}>
<button className="delete" onClick={this.deleteThisTask.bind(this)}>
×
</button>
<input
type="checkbox"
readOnly
checked={this.props.task.checked}
onClick={this.toggleChecked.bind(this)}
/>
<span className="text">{this.props.task.text}</span>
</li>
);
}
}
Task.propTypes = {
// This component gets the task to display through a React prop.
// We can use propTypes to indicate it is required
task: PropTypes.object.isRequired,
};In this component, we’ll be using _id selector for the relevant task and adding a update parameter which uses $set to toggle the checked field. These two arguments are used by update function to update the tasks whether it is completed or not.
While remove function only requires a selector as an argument to remove the specified task.
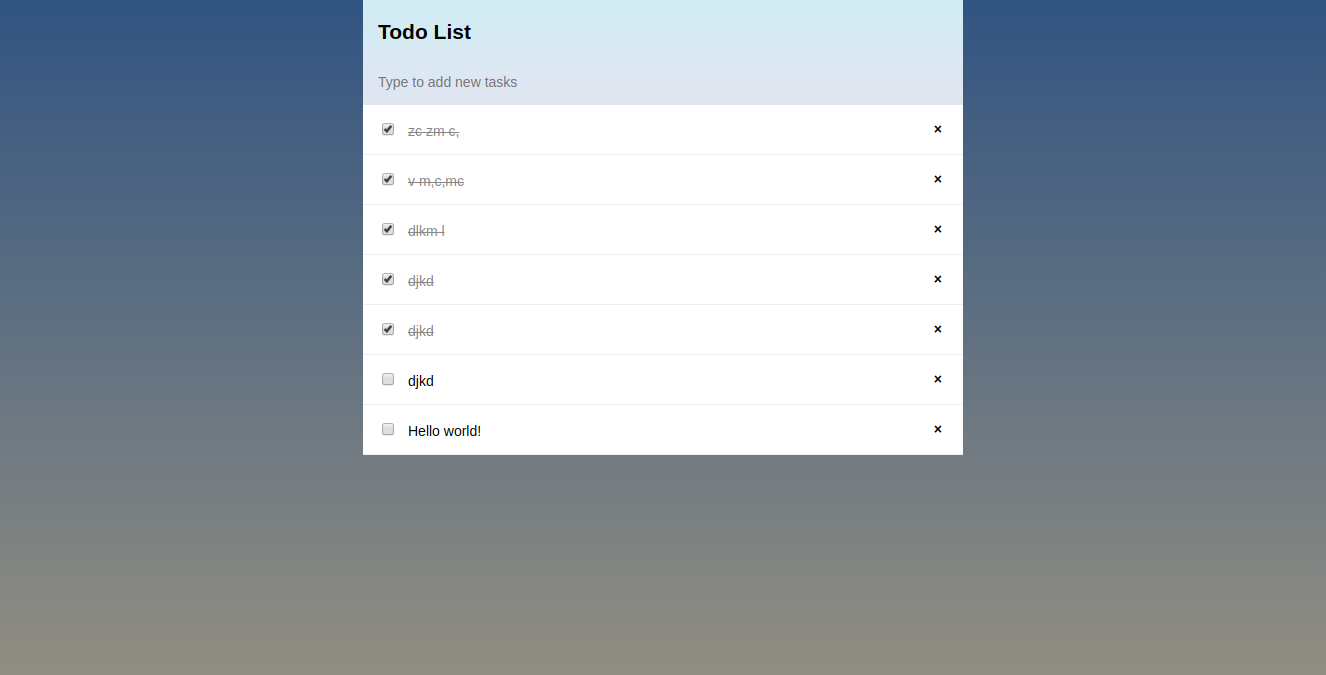
At this time your app, should look like the image below.

We’ve Come so far
Thank you for being with me so far. Our next steps will consider fixing some irregular behaviour and adding some extra features.
We’ll be continuing our App in the second part of this article. To see the source code of app, Visit here.
P.S. If you enjoyed this article, it would mean a lot if you click the 💚 and share with friends.

Newsletter
If you liked this post, sign up to get updates in your email when I write something new! No spam ever.
Subscribe to the Newsletter