FCC Speedrun — Project #2 Local Weather App
FCC Speedrun — Project #2 Local Weather App
This is my follow up post for the Chingu FCC Speedrun, if you haven’t read my previous post, please read it:
1. FCC Speedrun — Project #1 Random Quote Machine
Overview
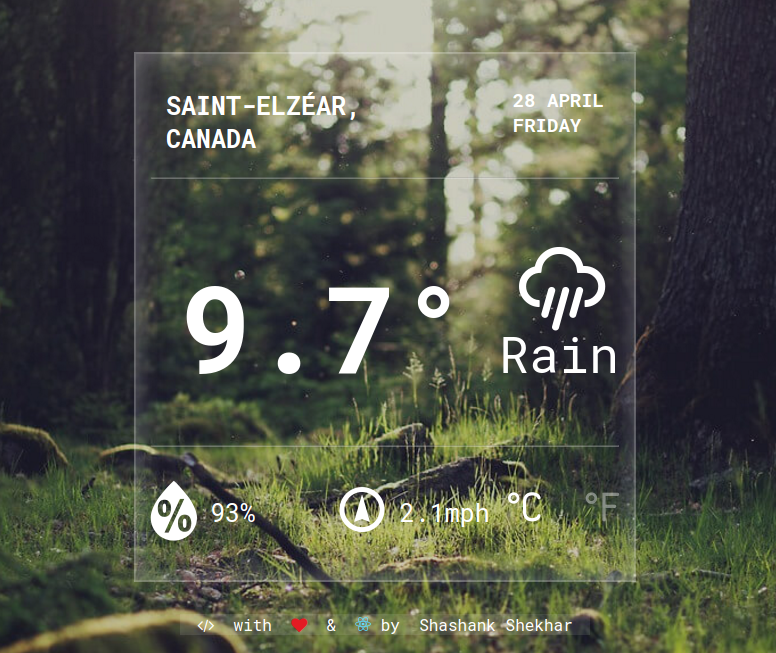
Local Weather App is a web app which helps you do two things:
-
See the weather condition at your current location
-
You can push the icons to toggle between Fahrenheit and Celsius.
 Screenshot of Local Weather App
Project Links
For Live viewing of Project #2, Please Visit here.
Project Github Repo: Please Visit here.
Description
This project uses some **ES6 **APIs, so you need to be familiar with it to get the idea of the code blocks used.
Project Structure
├── package.json
├── public
│   ├── favicon.ico
│   └── index.html
└── src
    ├── App.css
    ├── App.js
    ├── App.test.js
    ├── components
    │   ├── Api.js
    │   ├── WeatherClass.js
    │   └── WeatherDisplay.js
    ├── img
    │   └── bg-image.jpg
    ├── index.css
    └── index.js
Developing Stage
**1. **I used create-react-app to create a react app with Zero configuration.
- Written an API module to get data based on User’s location, I am using **axios** package to handle apis. I have used **Promises** api to asynchronously fetch the data from the api endpoints.
- The fetched data is then served to the App Component which reset the state values which are further used as props for WeatherDisplay Component.
- WeatherDisplay is the component which render the received props from App.js to the screen and also handles the user events ( includes changing the metric ).
- For displaying icons, I have used another module WeatherClass.js which takes the weather code as a parameter and returns the class of the font icon which best serves the weather condition.
- Details about packages/apis used:
a. **axios** : to handle the APIs
b. Erik Flower **Weather Icons**
c. **Dev Icons** for React font icon
e. **IP API** : to use user’s IP address
f. **Open Weather API {Ported to HTTPS}**: to view the weather condition at user’s location
If you want to see my **repo** for this project. please visit **here**.
Deploying Stage
I chose **Surge **to deploy my web app. In order to deploy my create-react-app web app, I needed to run the command npm run build so that it can minify the app and generate a static site which can be further deployed to **Surge/GHPages**.
While running surge you need to provide the root directory of your app, which is in this case build directory. Chose your sub domain name and you are done.
The **final deployed version** can be found **here**.
Conclusion
It was a complex project for me,being a beginner React JS developer and also it earlier used Cross Domain protocols (http/https). So, I re-ported the app to use **HTTPS **protocol, and now its working fine.
P.S. If you enjoyed this article, it would mean a lot if you click the 💚 and share with friends.

Newsletter
If you liked this post, sign up to get updates in your email when I write something new! No spam ever.
Subscribe to the Newsletter